 Here is the completed 12-1/2" Tea-Leaf block. It is made up of four 6-1/2" units which are all the same except for the fabrics.
 Your packages of fabrics and patterns are going in the mail very soon. I have am sending the following in each package:
~ eight 5.5" green background squares
~ sixteen 2" x 10" green background rectangles
~ two purple 3.5" x 10" rectangles
~ two magenta (pink) 3.5" x 10" rectangles
~ four different peach 3.5" x 10" rectangles
~ patterns (shown below) - The ones on the first picture are for reference mostly. You will use the "B" pattern piece to precut the "leaves" .

 NOTE: You will need to photocopy or trace the leaf pattern directly above this text until you have 8 copies. Then, turn the patterns over, and trace the lines so that they are visible from both sides (including outer seam allowance). This is an important step not to overlook. This pattern is your paper-piecing or foundation pattern, and measures 6.5" square.
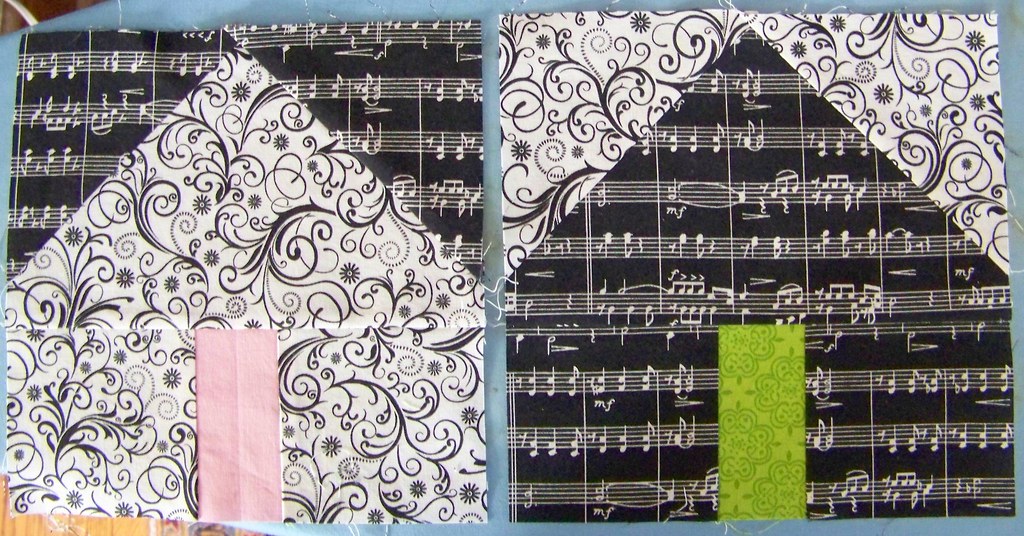
Below I show the fabrics sent with each package.
 Step 1: Please divide your package of fabrics into pieces for each block. Diagonally cut all 8 of the green background squares in half. Take 8 different green triangles. Take ANY 2 peach rectangles, one of the purple rectangles and one of the magenta (pink) rectangles. You will also need to horizontally cut (into 2"x5") the green background rectangles (2 photos down), and take two of each of the green rectangles.

Step 2: Cut out "leaf" pattern "B" from the patterns sent to you, including the seam allowance. Trace this onto all peach, purple and magenta rectangles. Cut them out. These are your "leaves" for the blocks.

 Step 3: Take your "leaf" and pin it onto the foundation pattern, centered.
 You may want to hold it up to the light to be certain that you have this piece centered, and have allotted adequate material to be in the seam allowances.
 Step 4: Locate the C & D small background rectangles. These should be from the same green fabric, and are made by cutting the 2"x10" strips provided in half. One at a time, pin one right sides together, to the edge of the "leaf". Note that the placement of the green fabrics DOES NOT HAVE TO COMPLY WITH THE BLOCK DIAGRAM ABOVE SO LONG AS ALL 3 SAME GREEN PIECES ARE ALL NEXT TO EACH OTHER.
Step 5: Turn the paper foundation/pattern OVER, and stitch along the line connecting the leaf to each of the C-D pieces. I stitch 2-3 stitches through the block outer seam allowances beyond the edges of where the line ends (as shown ahead). When paper-piecing, it is common to use a smaller than normal stitch length. This facilitates easier removal of the paper.  Here's a peek of the seam from the backside.

 Here's a peek of the seam from the backside.
Step 6: Press your piece over. It is fine to press on the paper. It may want to curl somewhat, but it's not a fire hazard. The pieces go beyond the block boundaries, but don't worry about that now. We will trim the block when it is finished.  Step 7: Repeat for the second C-D small rectangle. Pin in place. Turn pattern over. Sew along line. Press.

Step 7: Repeat for the second C-D small rectangle. Pin in place. Turn pattern over. Sew along line. Press. Step 8: Find the triangle of the same fabric of the C & D pieces you just sewed. You'll need to carefully center it into position as shown below. There is not a lot of excess in these triangle pieces, so be careful here. Turn it right sides together and pin.
 I like to hold the pattern up to a light. It helps me to center this triangle properly.

 Step 9: On the backside, stitch along the line, starting a couple stitches before the line and ending a couple stitches after it, as shown above.
I like to hold the pattern up to a light. It helps me to center this triangle properly. Step 9: On the backside, stitch along the line, starting a couple stitches before the line and ending a couple stitches after it, as shown above.
Step 10: Carefully hand turn the triangle over to see that it covers all of the seam allowances. If it does not, then you will need to remove it and adjust it's position. If it does, then go on to the next step.

Step 11: Trim the seam down to 1/4" .
 Step 13: Locate a 2"x10" strip and triangle of the same fabric (below). You do NOT have to use the same green fabrics in the SAME locations that I did.


Step 12: Press the seam down, and get ready to do the other side. We'll trim the outer edge of the block when the block is completed.
Step 13: Locate a 2"x10" strip and triangle of the same fabric (below). You do NOT have to use the same green fabrics in the SAME locations that I did.Step 14: Repeat the same procedure you did previously. Turn the rectangular strips right sides together and pin onto the edge of the "leaf".
Step 15: Turn the piece over and stitch along the lines which you drew on the backside of the pattern.

 Press.
 Step 16: Position the triangle right sides together, pin, turn over and stitch.

 Press.Step 16: Position the triangle right sides together, pin, turn over and stitch.
Step 17: Trim seam only after you have confirmed that it will press and cover all seam allowances. Press.
 Step 18: Now one-fourth of the 12" block is done, and it just needs to be trimmed to 6-1/2". Turn the block over to what you traced on the backside, and trim to 6.5" square.
 Here it is from the back...
 And here it is from the front (two blocks actually!)...

 Step 19: Repeat this procedure 3 more times. You will have 4 blocks, all with different green fabrics. There will be 2 peach "leaves", a magenta "leaf" and a purple "leaf". Believe it or not, these 4 blocks will take very little time once you get the hang of paper piecing. If you are comfortable with paper piecing after making on, then you can easily make several at a time.
 Arrange leaves just as shown above - The purple is on the upper left position, the magenta is in the bottom left and it does not matter at all where you choose to place the peach leaves. As said previously, I don't care where the greens are placed either, so long as they are located together on the block.
 Step 20: Before you remove the paper, stitch top two squares together. Sew along the line. Repeat for the bottom 2 squares.
 Step 21: Now, with the block in 2 pieces, it is OK to remove the paper. The trick to this is to gently fold the paper at the seam. It should remove quite simply if your stitches are small enough. Once removed, press these seams open.
 Here is the view from the backside.
 Step 22: Now, pin these 2 pieces together and stitch the last seam. You'll need to set your machine to the 1/4" seam allowance now since we've been stitching on a line thus far. Press the seam open. Your block should look like the one below, at 12-1/2" square. I did not trim this block at all! The paper piecing method results in a perfectly sized block !
 Step 23: The last thing I do is to stay stitch (in a normal stitch length) the areas shown which are on bias at about 1/8" from the edge. This keeps the block at this size until I sew them all together.
 ...and a closeup of the bias stay-stitching.

Have fun....Contact me if you have any questions!
 Step 18: Now one-fourth of the 12" block is done, and it just needs to be trimmed to 6-1/2". Turn the block over to what you traced on the backside, and trim to 6.5" square.
 Here it is from the back...
 And here it is from the front (two blocks actually!)...
 Step 19: Repeat this procedure 3 more times. You will have 4 blocks, all with different green fabrics. There will be 2 peach "leaves", a magenta "leaf" and a purple "leaf". Believe it or not, these 4 blocks will take very little time once you get the hang of paper piecing. If you are comfortable with paper piecing after making on, then you can easily make several at a time.
 Arrange leaves just as shown above - The purple is on the upper left position, the magenta is in the bottom left and it does not matter at all where you choose to place the peach leaves. As said previously, I don't care where the greens are placed either, so long as they are located together on the block.
 Step 20: Before you remove the paper, stitch top two squares together. Sew along the line. Repeat for the bottom 2 squares.
 Step 21: Now, with the block in 2 pieces, it is OK to remove the paper. The trick to this is to gently fold the paper at the seam. It should remove quite simply if your stitches are small enough. Once removed, press these seams open.
 Here is the view from the backside.
 Step 22: Now, pin these 2 pieces together and stitch the last seam. You'll need to set your machine to the 1/4" seam allowance now since we've been stitching on a line thus far. Press the seam open. Your block should look like the one below, at 12-1/2" square. I did not trim this block at all! The paper piecing method results in a perfectly sized block !
 Step 23: The last thing I do is to stay stitch (in a normal stitch length) the areas shown which are on bias at about 1/8" from the edge. This keeps the block at this size until I sew them all together.
 ...and a closeup of the bias stay-stitching.
Have fun....Contact me if you have any questions!


