Hello everyone! Here's what I'd like for my block (yes, just one, but it's pretty big).
This idea is a conglomeration of a bunch of things I've seen recently on blogs, etc.:
this quilt pattern from Carolina Patchworks, these
stashbuster blocks from Little Miss Shabby, and
this block, which is actually what started the ball rolling in my mind, from my friend Emily from my modern quilt guild. I told her my quilt idea at our last meeting and asked her if I could use her block as a starting point, and she actually came up with the ingenious idea that will simplify combining all 12 blocks in the end.
On to the "directions"--
Your fabric packages contain 4.5ish (some people only got 4 as I ran out of fabric!) strips of light blue solid, 2.5" x WOF, plus a piece 4.5" x ~20" that you may or may not need to use. I also sent about 40 different 2.5" squares to each person (hence the delay in mailing...it took *forever* to cut them all!).
I also included a small (13x13) sheet of graph paper for designing your block. When I went to make my sample block, though, I realized that this was much too big...nearly twice the size of two "regular" blocks, I hadn't sent enough of the blue, and plus it was just huge and kind of overwhelming. I retooled things a bit and I think what I've come up with is much more manageable.
Here's the layout of the whole quilt (click on the photo to see all 12 blocks).
I'm asking each person to design and then make one of the red rectangles, as identified by your name. These are 7 squares by 11 squares, or 14" x 22" (just a smidge bigger than 2 12"x12" blocks would be...308 square inches rather than 288. The spaces between each will be the sashing that I'll add in once I've gotten all the blocks back. The white squares will be more of the blue solid, and the red squares represent the spots where I'll use a 2.5" square of a print to connect the blocks. A google search for "free graph paper" will pop a bunch of sites, though for something so small it might be easier to just draw your own grid for planning out your design. I also included a copy of the quilt design without names at the very bottom of this post.
The look I'm going for is kind of a Pac-Man effect...as if he traveled onto the quilt on that red square the upper left above Tracy's block, and then meandered over the whole thing, exiting at the bottom right from Tami's. To achieve this, there are a couple of guidelines:
- please start and finish your design by including a print square directly adjacent to (not diagonal from) each of the red squares just outside of your block. Please leave at least one of the border squares on either side of that "entry" square empty (which means it will be the solid blue in the finished block) so that you'll create the effect of a path rather than a completed shape. For example, Tami would include a print square fourth from the right in the bottom row of her block, but would leave either the third or fifth from the right empty (solid blue).
- please make sure to leave a space between each row (no two rows of print just next to each other)...your path will meander and twist, but always with solid blue between the lines of print.
- feel free to use the border squares, as the sashing will create space between your block and the others around it.
- I've included almost enough 2.5" print squares, but don't feel obligated to use just the ones I sent. I would really like it if you included some of your own fabrics. I'm going for more brown than gray, more cool than warm, and prefer modern fabrics to anything novelty, country, or batik.
- if you would also include a loose square--yours or mine--onto which you've written your initials in pencil or water-soluble marker, that would be terrific; I'm going to embroider them and incorporate them into the back.
- I'll gladly accept whatever fabrics you don't use for the sashing and back, but if there's a square or two that you love and want, by all means, keep them.
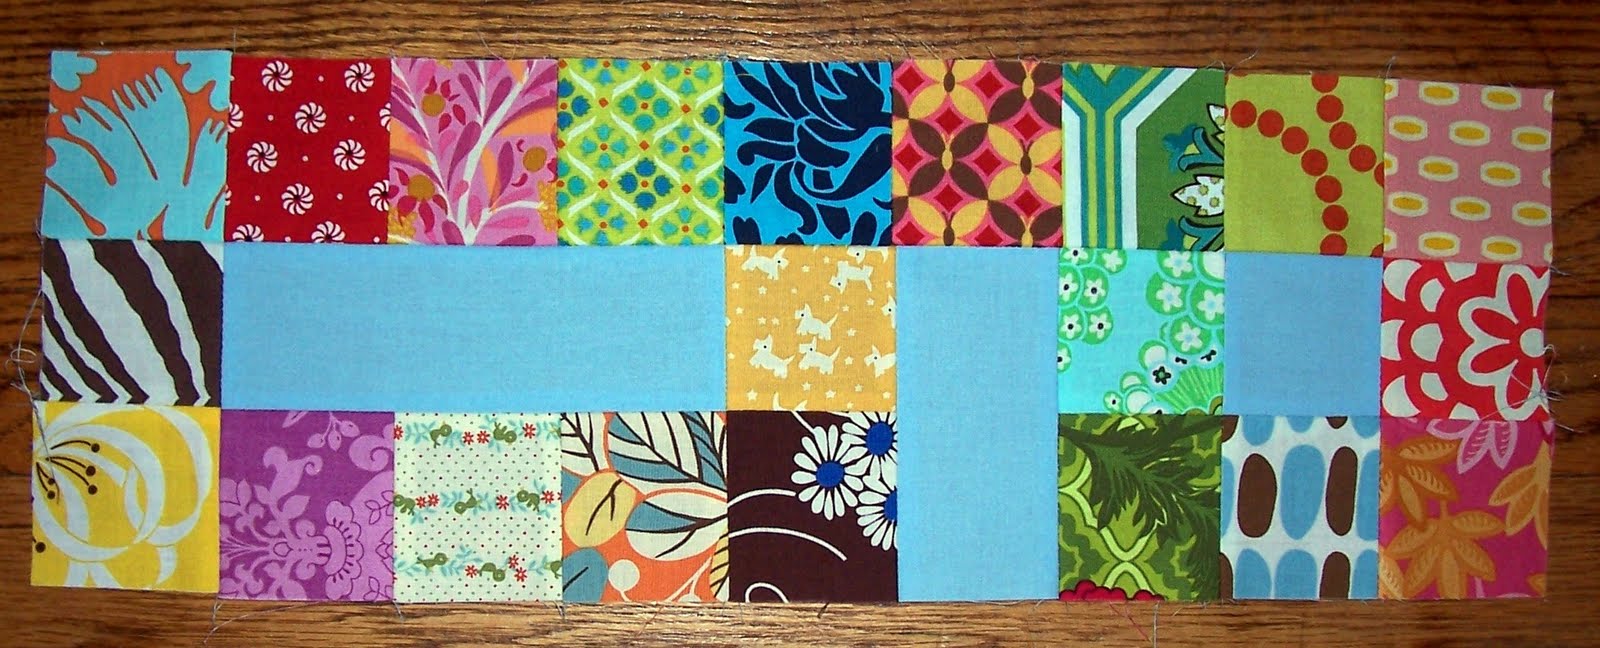
Whew! That sounds like so much info, but it's really easier to explain with a picture than words. Here are two different possibilities for my block (#5); I swapped them out so you can see how each one fits on the graph paper--
I ended up going with the second one, and here's a progress shot (this is most of the bottom three rows). I'll finish the block today, I hope, and will post a photo when it's done.
A couple of things that I found worked well to keep the piecing easy and the block square--I tried to work with small units and join those rather than strips (too easy, for me anyway, to find myself "off" with my seams by the end of a row, and then just pinned each intersection so that everything lines up fairly well. I also made sure to measure my 1/4" seam on my (old) machine, as I've had various kinds of trouble getting blocks to size out and this block will be most successful if things line up well. Maybe some of the more seasoned quilters in our group will have some more tips for keeping everything aligned and straight.
Thank you for reading my novel...I really think it will take about as long to actually make the block as it did to read all of this! Hopefully, some of you should start receiving your fabric today or tomorrow. Again, since I was so late in mailing these out, take your time...I have plenty to keep me busy until everyone gets a chance to make them.
Thank you so much! Please let me know if you have any questions.
blank layout:


 Lynette's October blocks! For a slightly longer post see my blog.
  I love the way those swimming fish turned out! When I was working on these blocks I kept asking myself why I didn't buy any of the Lantern Bloom fabric when it came out? What was I thinking?!
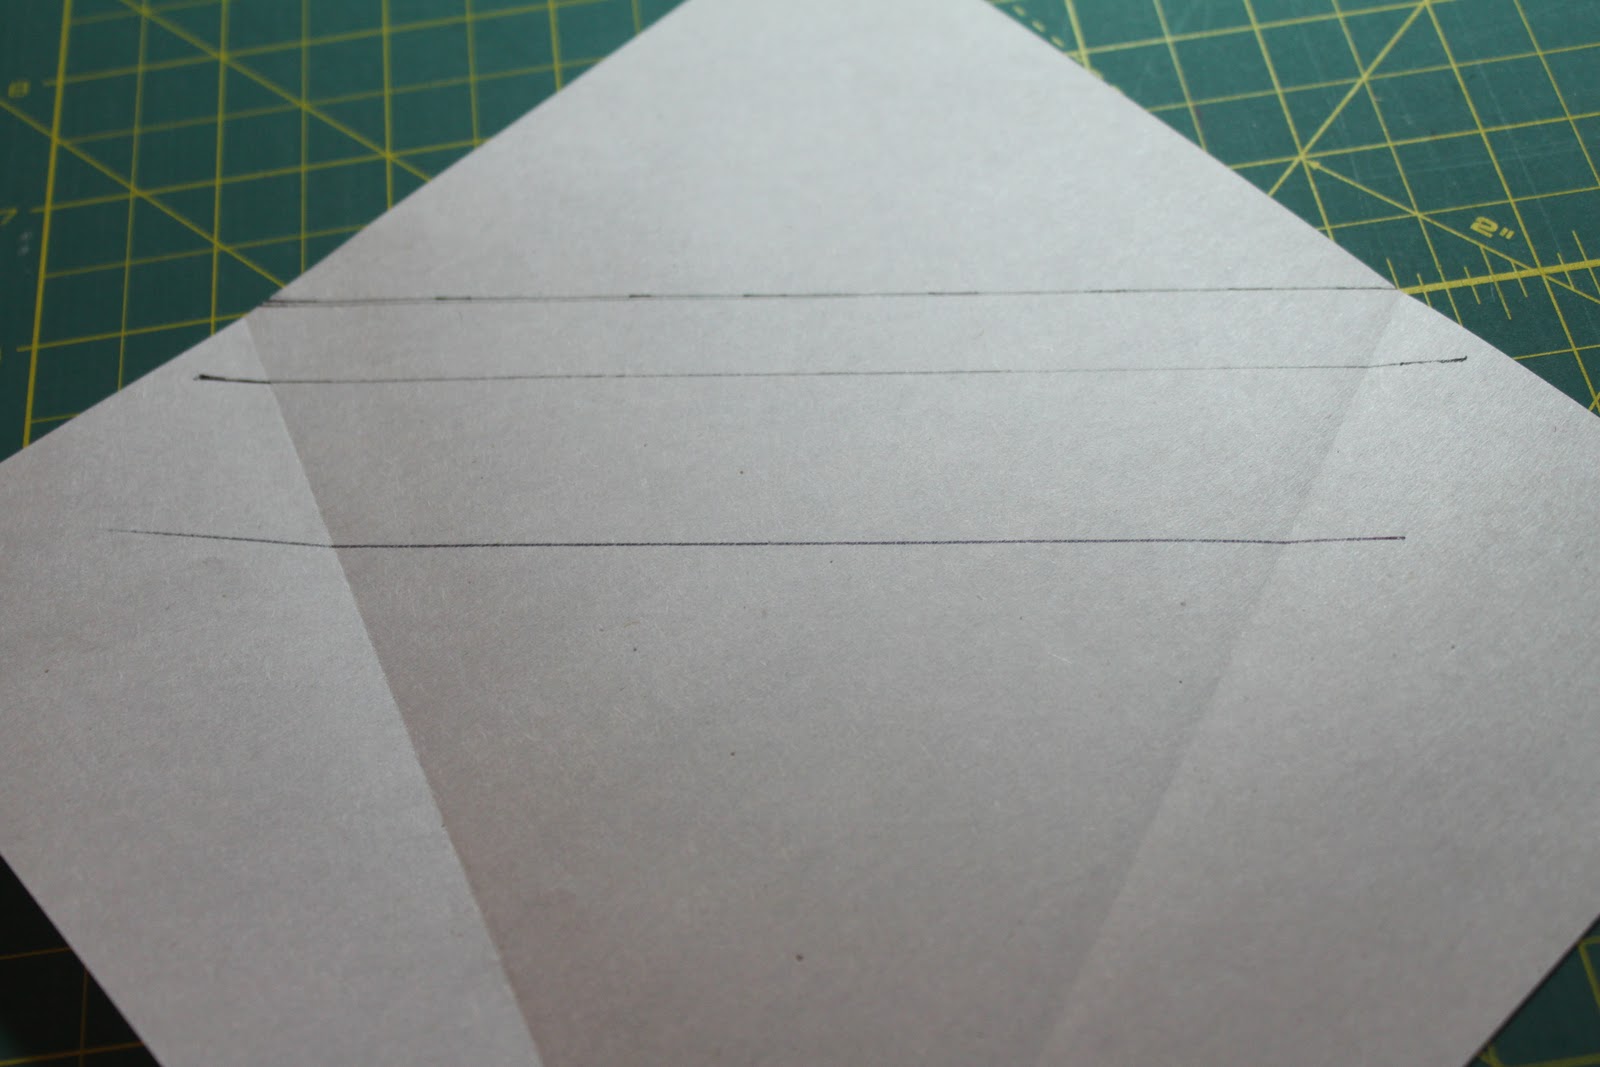


 Perhaps not the most creative maze here, but I messed up initially. The maze paper that was sent with my fabric was a 13x13 grid so I sketched my maze here, and promptly started sewing sections of printed fabrics accordingly. When I ran out of squares, I checked the blog instructions to find it is only supposed to be a 7x11, so the resulting maze was developed from the block sections I had already sewn!


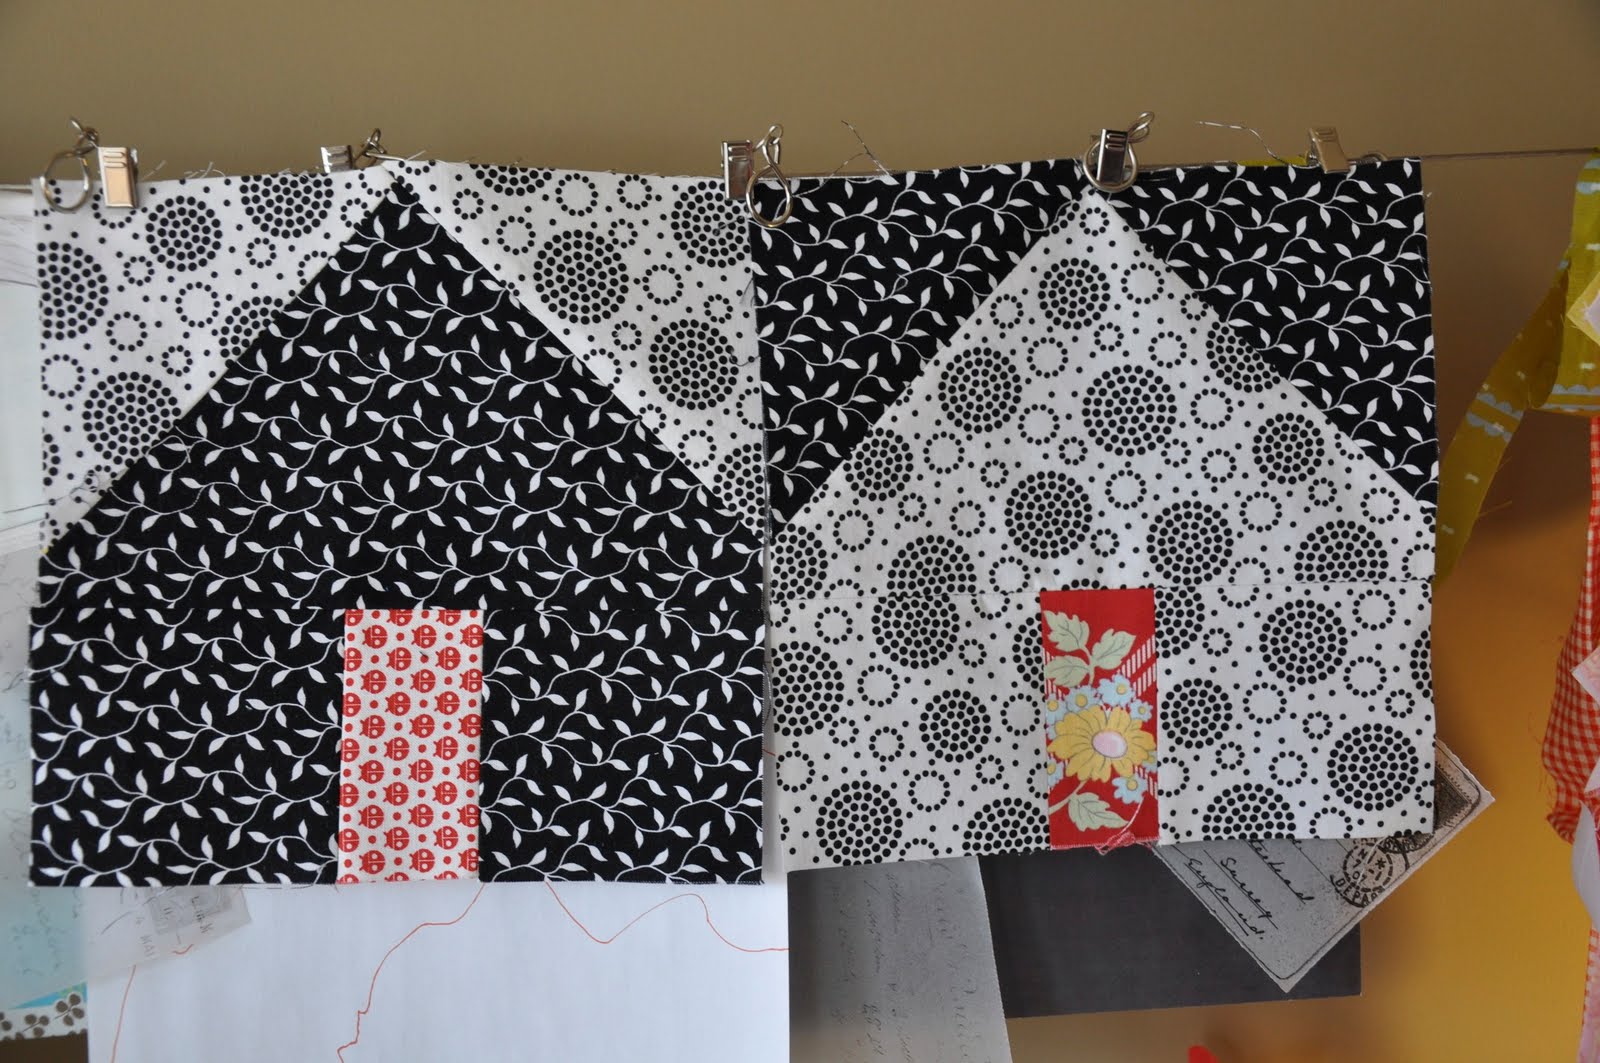 These sweet blocks have been done for a little while but I couldn't find a minute to take a picture of them.
  Here is the completed 12-1/2" Tea-Leaf block. It is made up of four 6-1/2" units which are all the same except for the fabrics.
 Your packages of fabrics and patterns are going in the mail very soon. I have am sending the following in each package:
 NOTE: You will need to photocopy or trace the leaf pattern directly above this text until you have 8 copies. Then, turn the patterns over, and trace the lines so that they are visible from both sides (including outer seam allowance). This is an important step not to overlook. This pattern is your paper-piecing or foundation pattern, and measures 6.5" square.
 Step 1: Please divide your package of fabrics into pieces for each block. Diagonally cut all 8 of the green background squares in half. Take 8 different green triangles. Take ANY 2 peach rectangles, one of the purple rectangles and one of the magenta (pink) rectangles. You will also need to horizontally cut (into 2"x5") the green background rectangles (2 photos down), and take two of each of the green rectangles.


 Step 3: Take your "leaf" and pin it onto the foundation pattern, centered.
 You may want to hold it up to the light to be certain that you have this piece centered, and have allotted adequate material to be in the seam allowances.
 Step 4: Locate the C & D small background rectangles. These should be from the same green fabric, and are made by cutting the 2"x10" strips provided in half. One at a time, pin one right sides together, to the edge of the "leaf". Note that the placement of the green fabrics DOES NOT HAVE TO COMPLY WITH THE BLOCK DIAGRAM ABOVE SO LONG AS ALL 3 SAME GREEN PIECES ARE ALL NEXT TO EACH OTHER.
 Here's a peek of the seam from the backside.
 Step 7: Repeat for the second C-D small rectangle. Pin in place. Turn pattern over. Sew along line. Press.
 I like to hold the pattern up to a light. It helps me to center this triangle properly.
 Step 9: On the backside, stitch along the line, starting a couple stitches before the line and ending a couple stitches after it, as shown above.
 Step 13: Locate a 2"x10" strip and triangle of the same fabric (below). You do NOT have to use the same green fabrics in the SAME locations that I did.


 Press.
 Step 16: Position the triangle right sides together, pin, turn over and stitch.
 Step 18: Now one-fourth of the 12" block is done, and it just needs to be trimmed to 6-1/2". Turn the block over to what you traced on the backside, and trim to 6.5" square.
 Here it is from the back...
 And here it is from the front (two blocks actually!)...
 Step 19: Repeat this procedure 3 more times. You will have 4 blocks, all with different green fabrics. There will be 2 peach "leaves", a magenta "leaf" and a purple "leaf". Believe it or not, these 4 blocks will take very little time once you get the hang of paper piecing. If you are comfortable with paper piecing after making on, then you can easily make several at a time.
 Arrange leaves just as shown above - The purple is on the upper left position, the magenta is in the bottom left and it does not matter at all where you choose to place the peach leaves. As said previously, I don't care where the greens are placed either, so long as they are located together on the block.
 Step 20: Before you remove the paper, stitch top two squares together. Sew along the line. Repeat for the bottom 2 squares.
 Step 21: Now, with the block in 2 pieces, it is OK to remove the paper. The trick to this is to gently fold the paper at the seam. It should remove quite simply if your stitches are small enough. Once removed, press these seams open.
 Here is the view from the backside.
 Step 22: Now, pin these 2 pieces together and stitch the last seam. You'll need to set your machine to the 1/4" seam allowance now since we've been stitching on a line thus far. Press the seam open. Your block should look like the one below, at 12-1/2" square. I did not trim this block at all! The paper piecing method results in a perfectly sized block !
 Step 23: The last thing I do is to stay stitch (in a normal stitch length) the areas shown which are on bias at about 1/8" from the edge. This keeps the block at this size until I sew them all together.
 ...and a closeup of the bias stay-stitching.

